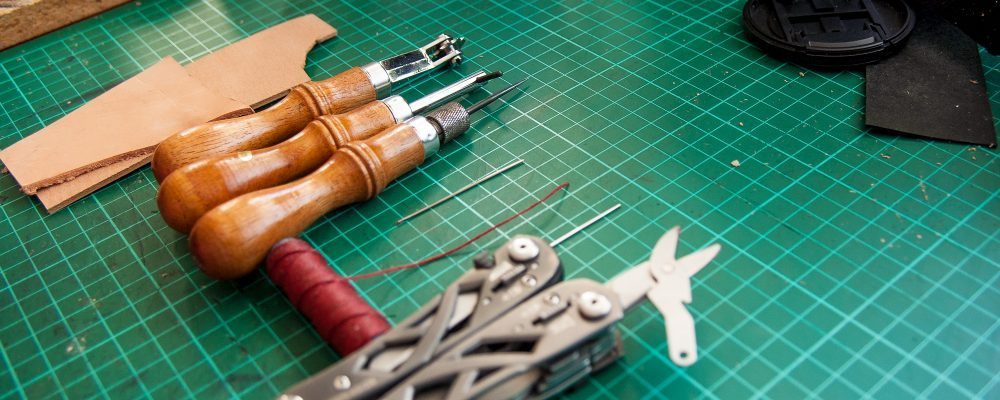
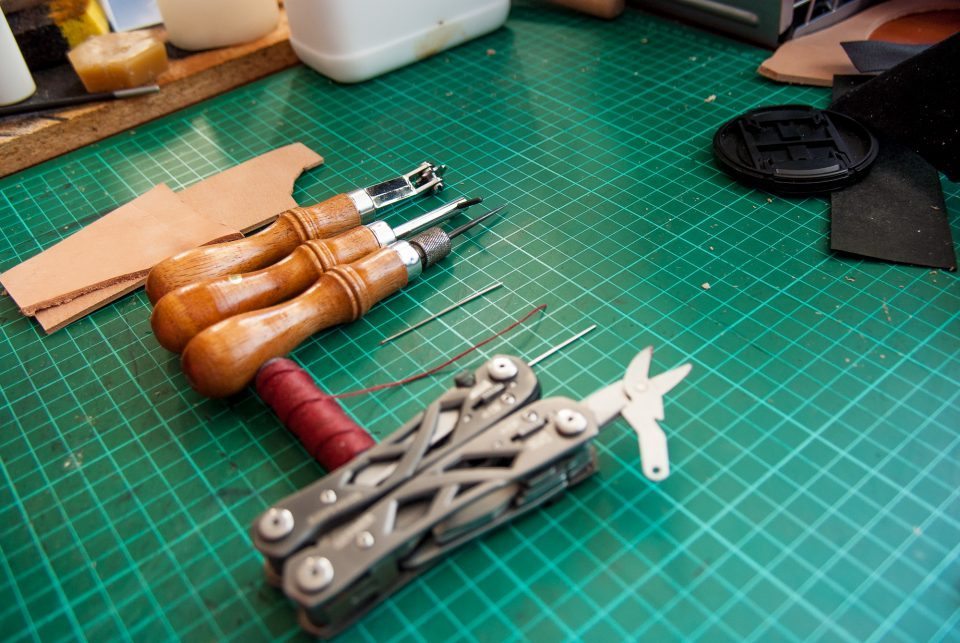
To start out, you’ll need your leather pieces (whatever project you’re working on or maybe just some scrap to practice on), a [amazon_link id=”B0038HWMB2″ target=”_blank” container=”” container_class=”” ]Stitching Wheel[/amazon_link], [amazon_link id=”B004NEEYII” target=”_blank” container=”” container_class=”” ]Stitching Groover[/amazon_link], [amazon_link id=”B0044E2V8W” target=”_blank” container=”” container_class=”” ]Sewing Awl[/amazon_link], 2 Needles, [amazon_link id=”B0039ZUQDO” target=”_blank” container=”” container_class=”” ]Waxed Thread[/amazon_link] and any kind of scissors. Note: I’m using a [amazon_link id=”B003RL5FKO” target=”_blank” container=”” container_class=”” ]stitching pony[/amazon_link] in the photos. You won’t need one to start with or if you only do a few projects but it helps to hold your leather in place while sewing.
Even more basic:
If you’re only sewing one project and you don’t want to buy too many tools, you could start out with only a [amazon_link id=”B0044E2V8W” target=”_blank” container=”” container_class=”” ]Sewing Awl[/amazon_link], 2 Needles, [amazon_link id=”B0039ZUQDO” target=”_blank” container=”” container_class=”” ]Waxed Thread[/amazon_link] and scissors. To get even stitches, you would have to make sure that you mark each stitch by hand (using a ruler or something similar). It’s very important to have even stitching with a constant distance to the edge as well as constant stitch length.
Let’s get started:
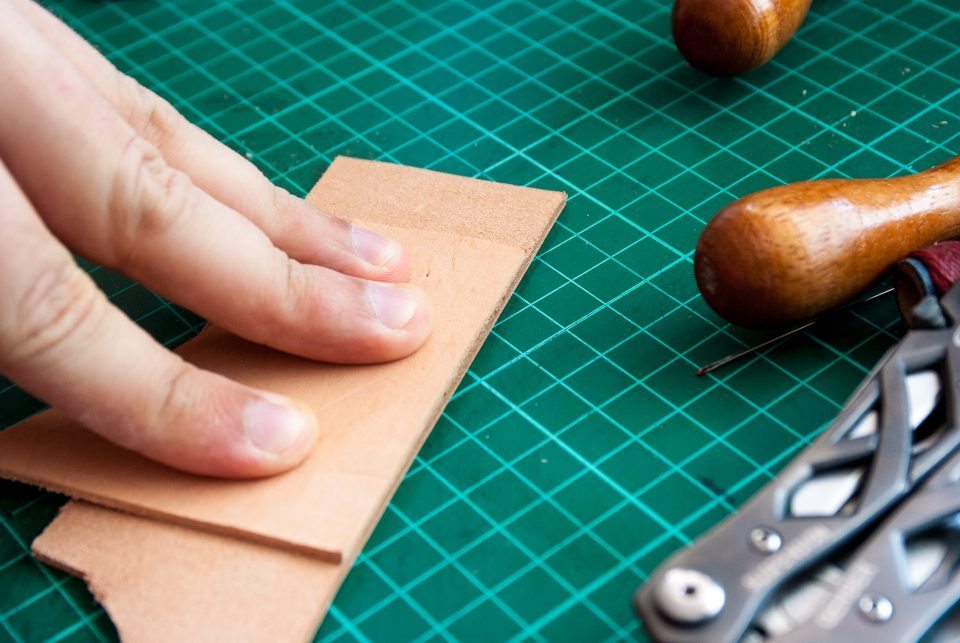
Step 1: Glueing leather pieces
Glueing the pieces in place helps with your sewing because you won’t have to worry about the leather not lining up. Use any leather glue you can find.
Step 2: Stitching Groove (optional)
If you have a stitching groover, use it to create the groove along which you’ll sew. If you don’t have one, you could mark a line with a ruler and any tool you can find that can leave a slight mark on the leather. You will need a guide to sew along if you want it to look even!
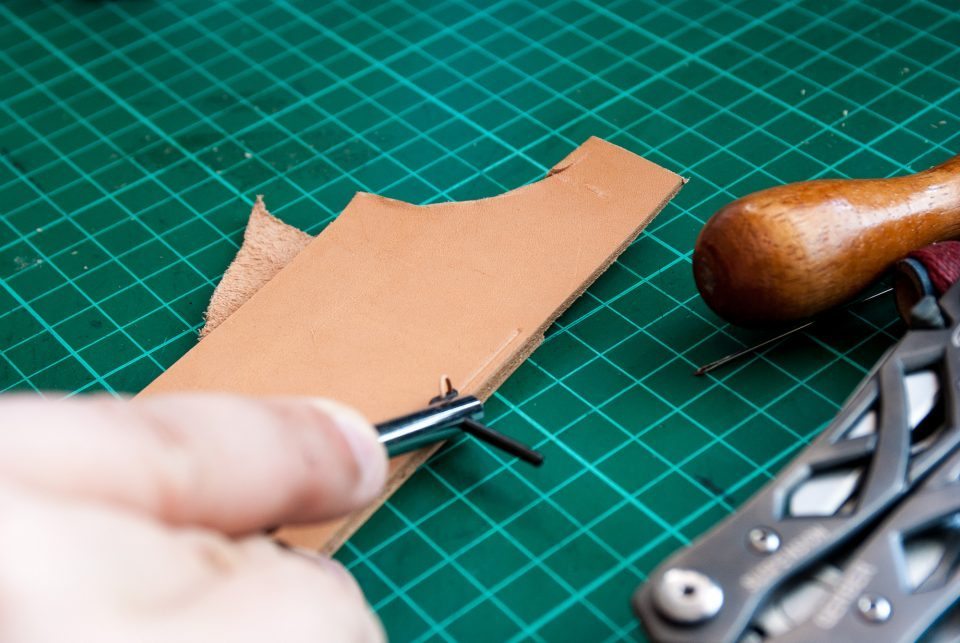
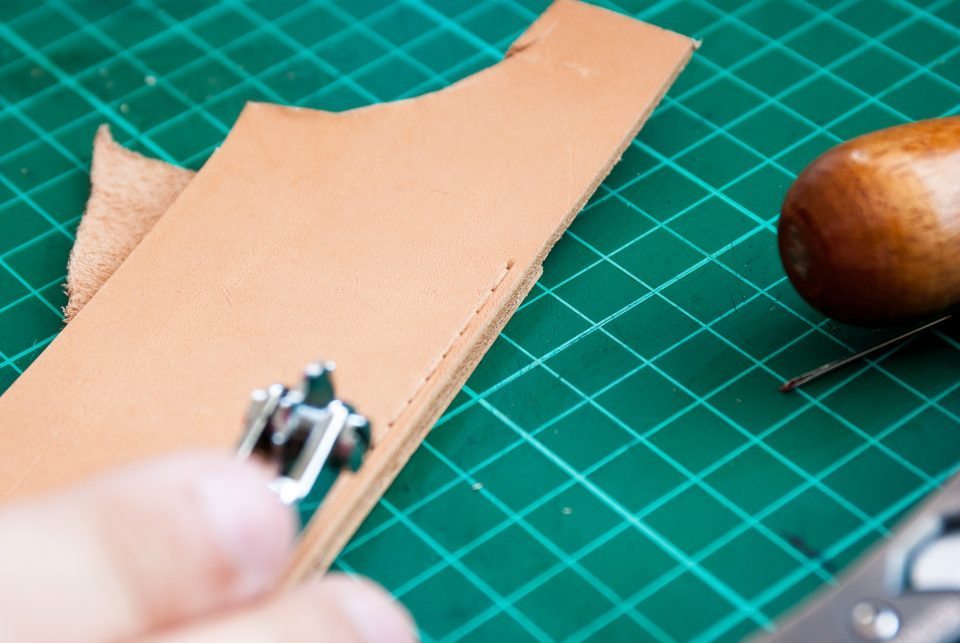
Step 3: Mark Stitch Spacing (optional)
If you have a stitching wheel, mark the spacing like you can see it in the photo. Without one, you could use the awl to lightly mark the leather at even distances. Again, this is important preparation to get an even and professional look.
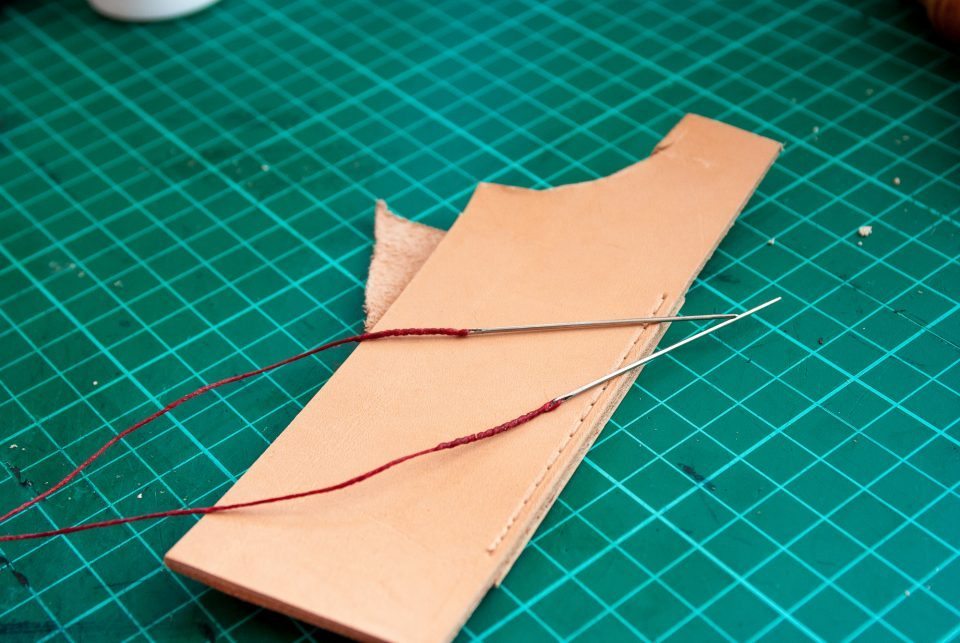
Step 4: Prepare Thread & Needles
Prepare your 1 thread with 2 needles (one on each end).
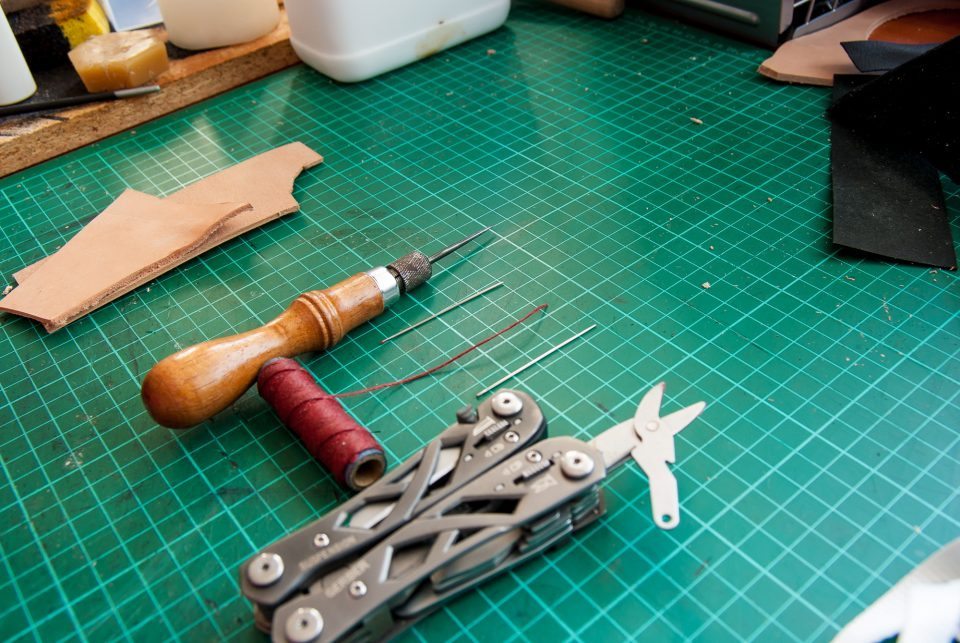
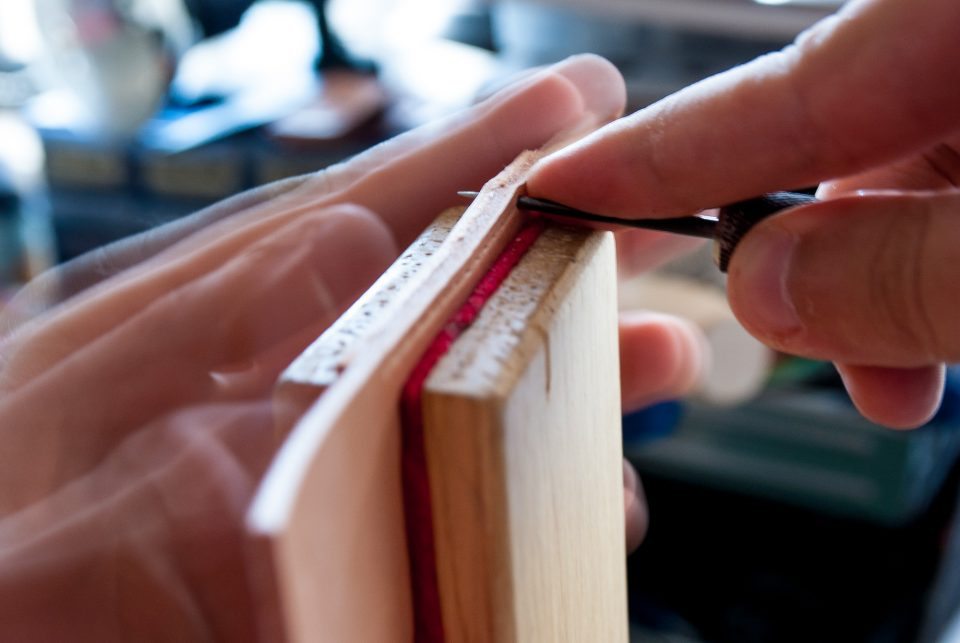
Step 5: Pierce the leather with the awl
The leather is very thick and you’ll have to pierce the holes using an awl. When doing so, make sure you always hold it straight and don’t pierce the leather at an angle. You can use your left hand to support the leather on the other side if it moves too much.
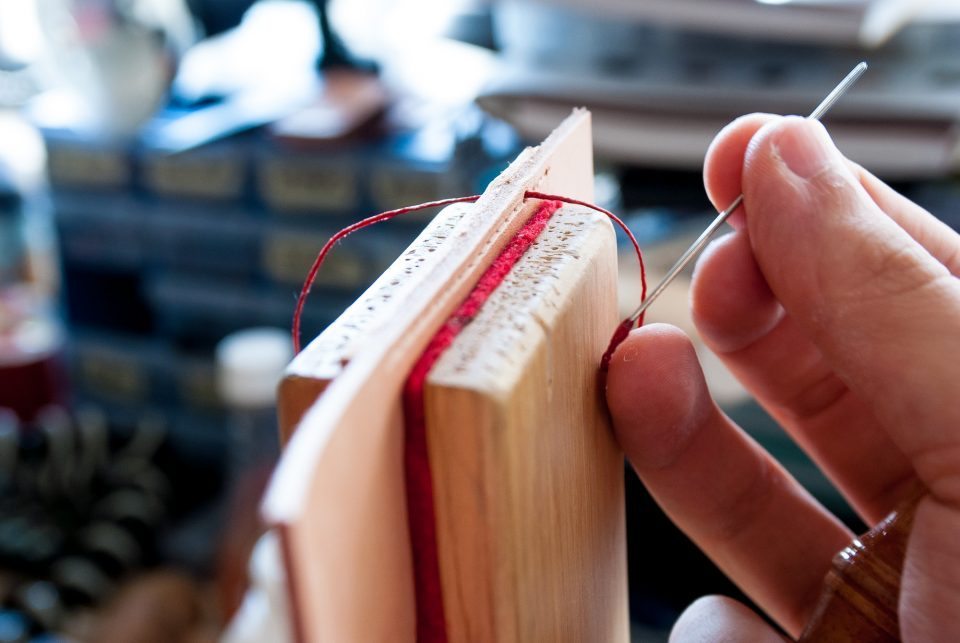
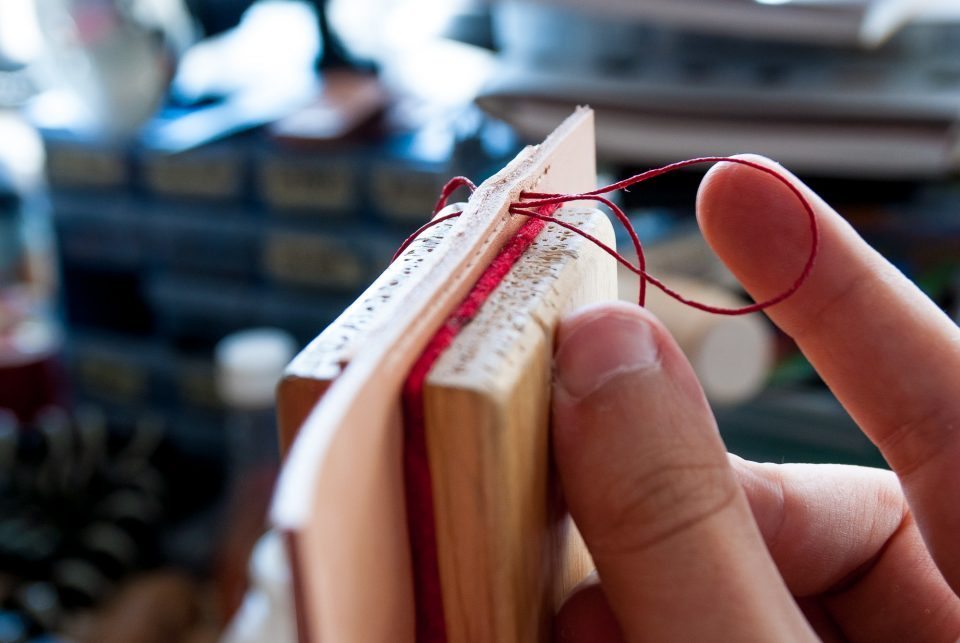
Step 6: Pull first needle through
Pull the needle through the hole until you are at the centre of the thread (each side should have the same amount of thread).
Note: I’m going to refer to the needle in your right hand as needle 2 and the one in your left hand as needle 1.
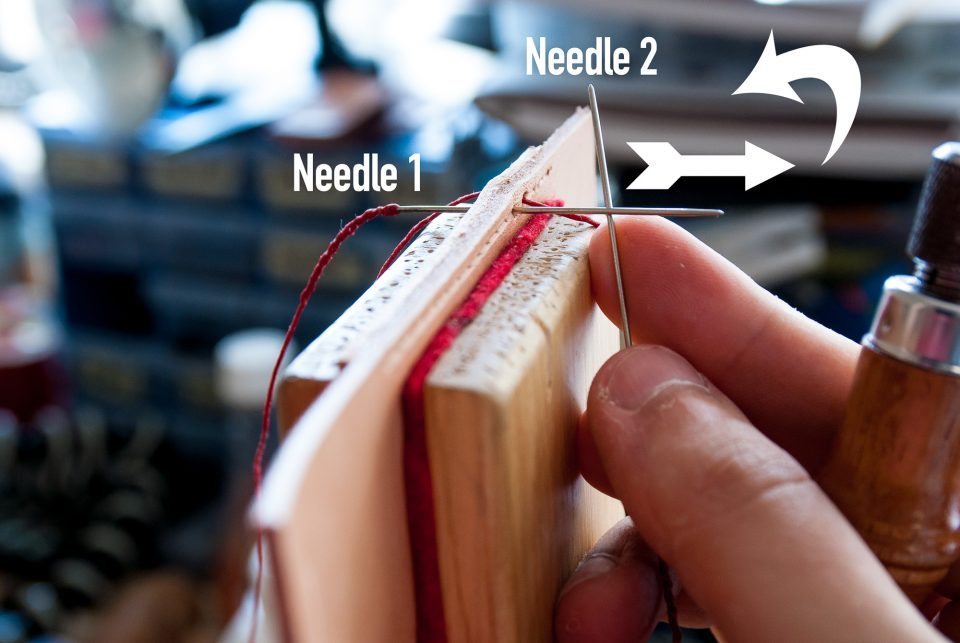
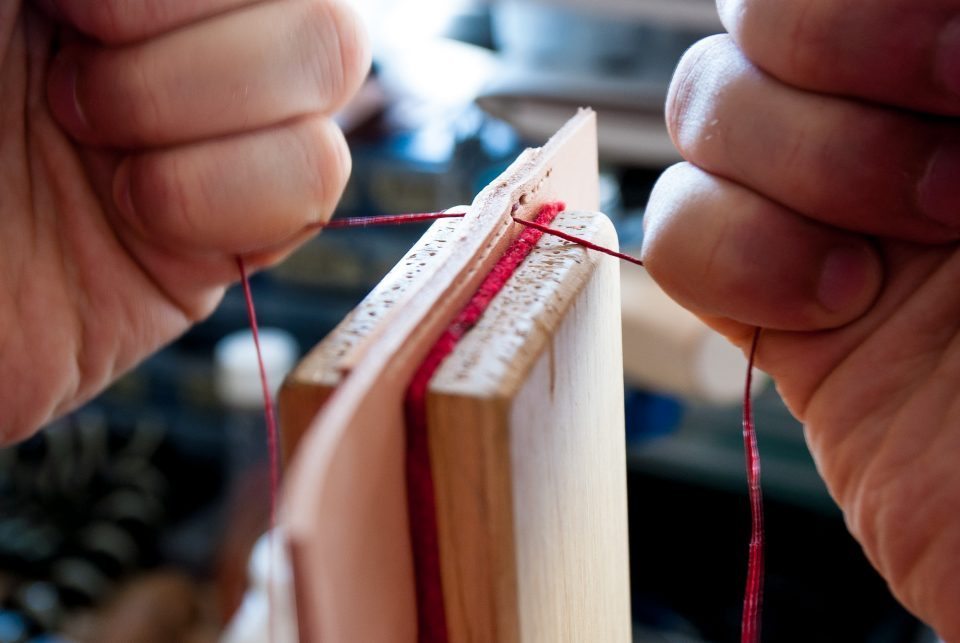
Step 7: At the second hole
Pierce another hole next to the previous one with your awl and push the left needle (needle 1) through while holding the needle 2 behind it.
Once you pulled needle 1 through the hole, twist your right hand (holding both needles) towards you and push needle 2 through the same hole as the thread. Be careful not to pierce the thread!
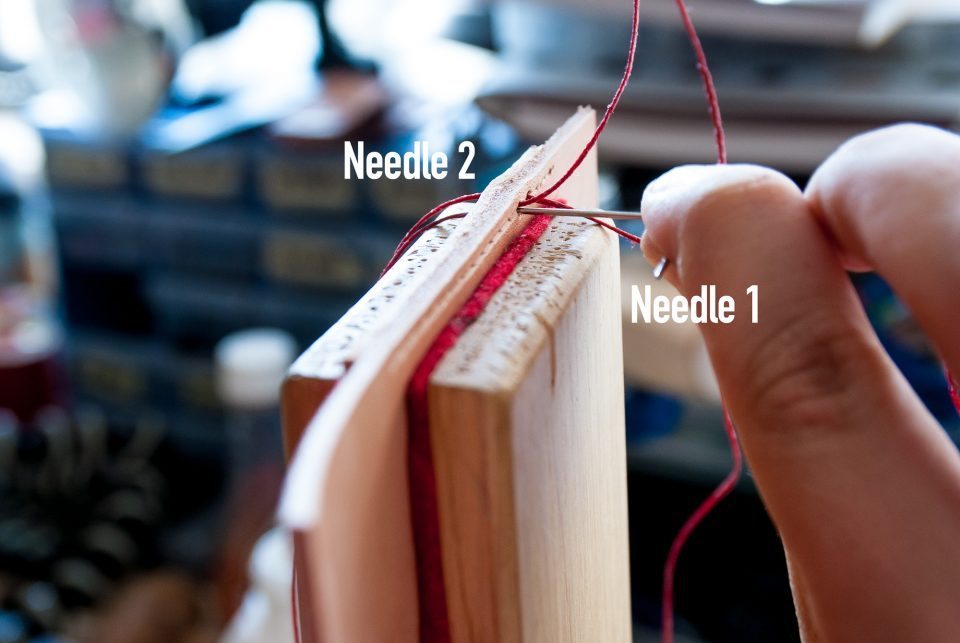
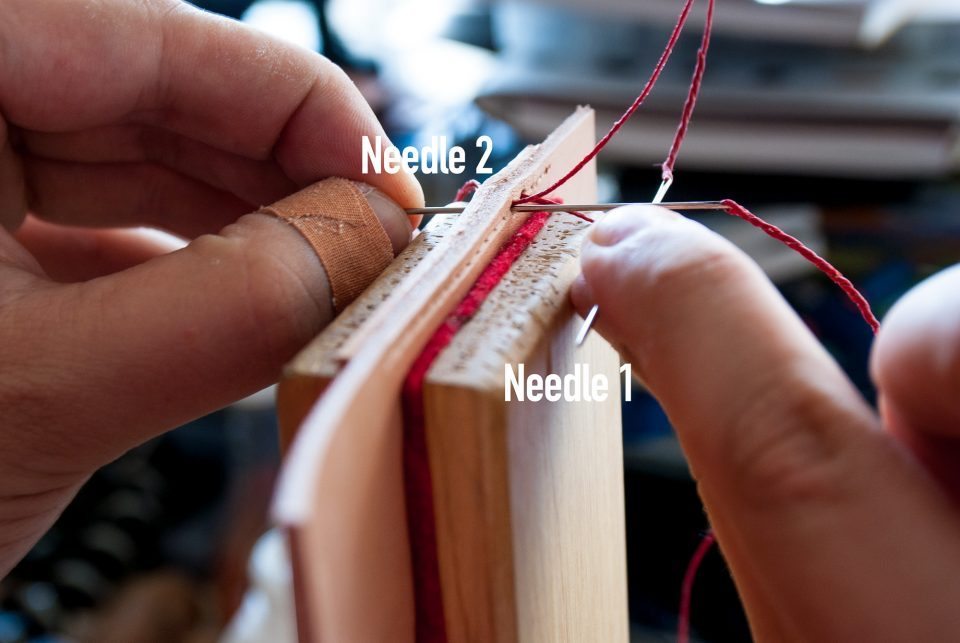
Here’s another view
Hand-Sewing-Leather-highonglue.com-step12
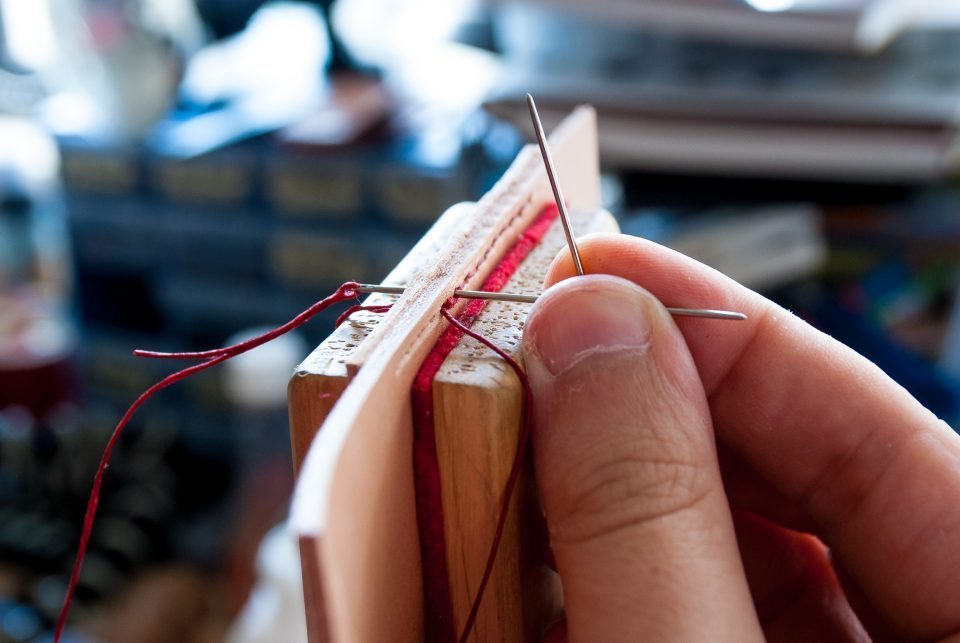
Make sure to always pierce the needle next to the thread (closer towards you) to make the stitches more even.
The rotation creates a knot that can now be pulled through the leather.
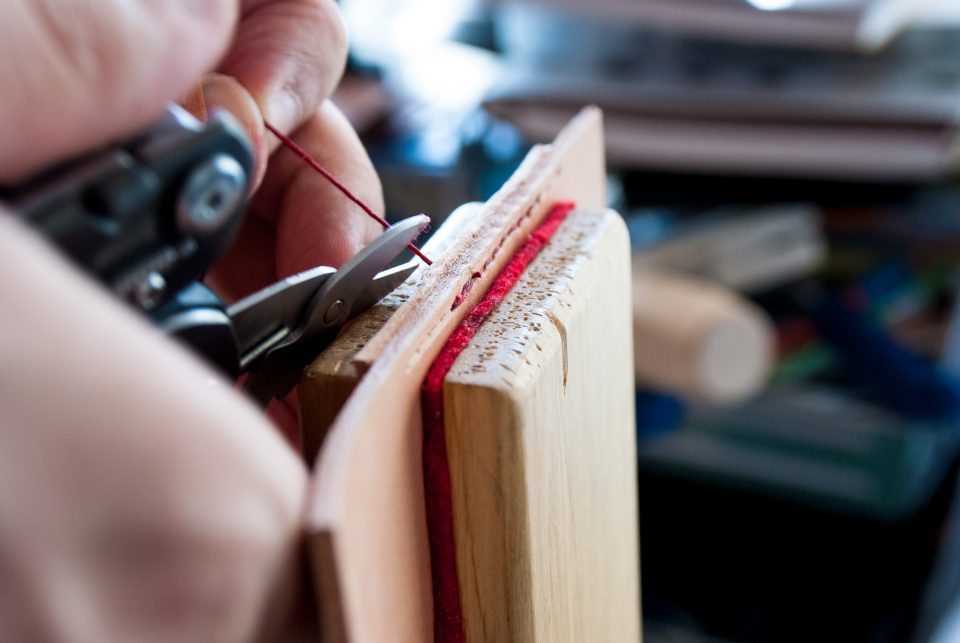
Step 9: At the end of the stitch
When you’re finished, make sure to backstitch 2 holes into the direction where you started to secure the thread. You can use your awl to enlarge the existing holes.
Step 10: Finishing
Cut the threads close to the leather.
Hand-Sewing-Leather-highonglue.com-step17
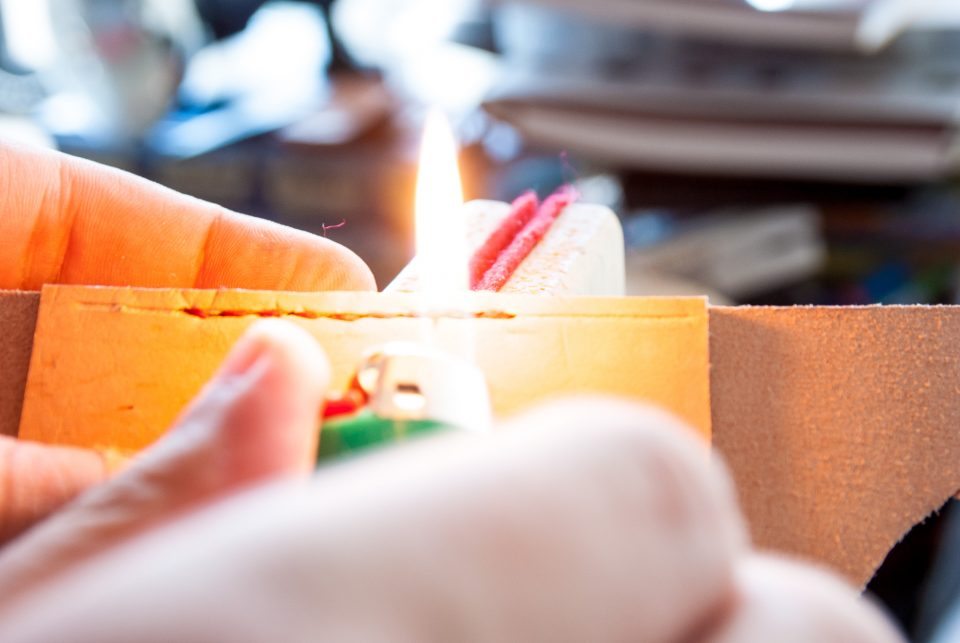
If you’re using polyester thread or unwaxed thread that might start fraying, you can burn the ends of the thread to melt them. That will keep them from fraying. Be careful not to mark or burn the leather!
Finished!
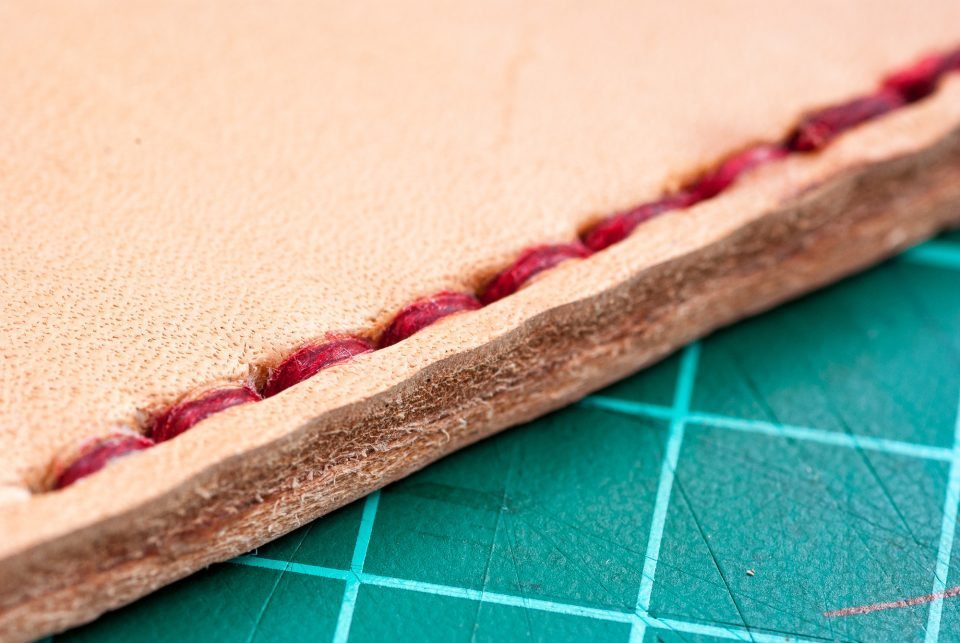
If you have a stitching wheel, you can run over the stitch again to even them out even more. It helps to give your project a better look and feel! Here’s a closeup of a piece of hand sewn leather scrap.
Did some leather-work as child & now this is REALLY worthwhile learning just how to do this. I combine it with Woodworking in my do-all Workshop. Great for exercising my 70year old arthritic hands &, yes, if you say so, brain. THANKS a lot! Stan from the best peope & place – Red-Dune Kalahari.
Wonderful tutorial with great photos!
I’m trying to find information on how to stitch two pieces together that would lay flat side by side rather than one top of the another, any suggestions?
Hi Beth, there are different ways to do that. For example you could go with an X pattern. Hopefully that makes sense… It’s a bit hard to explain without photos. I’ll add that to a future post.
Hi Beth,
I made a hat 20 years ago with a stitch that shows only on one side. The other side has an almost invisible joint where the two pieces butt together, just as you describe. I don’t remember how I did it and it seems an impossible stitch as I look at it now. I’ll email you pictures of both sides, if you like; maybe you can figure it out and tell ME.
How
Hi Dawn, that’s a stitching pony or stitching horse. They come in different sizes (small ones you can have on a table or up to large ones with a chair/bench attached). You can find them at any leathercraft store or at places like weaver… Or you can make your own
Excellent Tutorial thank you very much! This really helped me get into it! How do you get your stitching to line up perfectly on both sides? Meaning, my stitching lines up perfectly on the side that i push the awl through but then on the other side it’s less in line? Do you press the awl through from both sides or what? Thanks so much.
Hi Marius, that’s great to hear!
Re: lining up both sides: Depending on the pieces that I want to sew, I might for example pre-punch the holes on both sides (you can use a stitching punch or chisel for that) or when I push the awl through from one side, I’m watching the other side and make sure that it comes through where the stitch is marked. This obviously only works if you run the stitching wheel on both sides and make sure that you have the same number of stitches on both sides, too.
It can help to pre-punch with both faces alongside each other, right side up, butted edge to edge. Firstly cut a stitching channel, on both pieces so the channel gauge is the same, then butt the two together, and mark in the channel. Finally, use the awl to pierce on the marks, so they visibly match. Sew immediately so nothing gets displaced!
Swagger sticks are usually pre-pierced and sewn wet in a running stitch, passing from the underside up through the next hole on the opposite side every time. As the leather dries, it tightens, pulling what’s already rather a tight seam taut and embedding the thread in the surface.
Hi Marius!!! Thanks for the great lesson. I would also like to know how to sew a flat seam for thick leather. Also, do you have a formula for measuring the length of cord used?
Hi, Thanks for the lesson! Quick question – when you put needle 2 through, then right next to it punch needle 1 through. Does needle 2 go through the needle 1 hole? Silly question but want to be clear.
Hey Steve, there are a couple of ways to make sure both sides are clean. The easiest is probably using something like a drill press and pre-drill the holes (and then run over it again with the stitching wheel to clean it up).
You could also try to pre-punch the holes on each layer separately. Aligning the layers might end up being tricky though…
If you’re using an awl, you could try and closely look at the back side to make sure you exit the leather in the right position (with pre-marked stitching hole positions).
Those are the main things I’d try first. If it’s really thick, your best bet is probably the drill press.
Since only the outside two pieces show, punch all the holes in those two pieces clamped together, then put the third piece between them and use the existing holes as a guide to punch the middle/hidden piece.
I use 2.5” finishing nails. They make the right size holes and the long length makes them easy to keep perfectly perpendicular. Nail your work to a board by putting the first couple in key stitch spots that insure parts stay aligned perfectly while you put the rest in. The nails need only go 1/8 – 1/4” into the wood. Soft wood like pine is best so they are easy to pull out. I can drive them through 4 layers of 10# leather with ease and it doesn’t weaken the leather like drilling. If the holes are not quite big enough, just leave the nails in for an hour or so before pulling them out. They tend to close up quite a bit after a few minutes if you pull them out quickly. I only leave them in if I’m double stitching.
how, I am wondering how to get such a clamp setup to hold the leather piece vertically as you have shown in the photos. Also, Hobby Lobby has waxed cotton thread. Is that suitable if I am trying to make just a laptop sleeve?
You can look around for a stitching pony or stitching horse (or plans to make one yourself). There are a few variations available depending on the size you might need.
Waxed cotton thread sounds good for a laptop sleeve. I’m not familiar with what Hobby Lobby has (since I’m in Australia) but if it’s waxed thread for hand-sewing, it’s probably good for the job
Hi Attila, what are you thoughts on awls that have thread built-in? I’ve used one, but without the groover or wheel so the stiches aren’t as clean. It seems to make the same stitch but I’m not sure if getting the stitches straight is enough for a more professional-look. Is having separate thread and awl better?
Hi Alvin, I used one of them once for about 5 minutes and didn’t like it at all. Pretty much a waste of money for this type of work. I think it’s best to learn how to sew using 2 needles and an awl (or stitching chisel). Much cleaner and more durable result.
I’ve used a “Speedie Stitcher” too. It results in a sewing machine type stitch that is less strong and, I think, less attractive, than a two needle saddle stitch
Instead of a groover and stitching wheel…I use old forks I bought at a flea market. I lay the fork with one tine on the leather and the tine next to it along the edge of the leather, and drag it around to create a clean line. Then I bring the fork up and press it along the line I created to make indents showing where I need to pierce.
Thanks Ken! Generally I use around 4 times the length of the area to be sewn and it works out fine for most sizes of stitches and material thicknesses.
Thanks for this and other great tutorials. I’ve just recently started to work with leather and noticed that you use the kind of leather I can’t find in stores. What they sell is a textured dyed leather, not this smooth light-brown one. Is it simply not yet dyed leather?
And if I may ask, can you tell if there is a difference in how hard you pull the threads. It seems that during my last stiching I pulled it too hard and the edges became somewhat distorted.
Thank you very much!
The main leather here is vegetable tanned full grain leather. It’s used for things like saddles and similar sturdy things and is much stiffer than upholstery or garment leather. You should be able to find it in a leathercraft store or maybe even direct from a tannery in your area.
Hi there. Excellent tutorial! I just have a few short questions. Let’s say I’m making something that will lay up against the skin. About that seam, will it be rather thick? I mean, how much would that rub against the skin? I’m assuming it will cause a blister, like our shoes did back in the day. If I were to make a slightly padded lining for it, to avoid rubbing on the skin, could I sew the lining at the same time as the leather? Any suggestions on that?
Yes, you can sew the padded lining to the leather like that to avoid rubbing against the skin. You could also make the stitching groove deep enough so that the thread won’t touch the skin (if the leather is thick enough and/or the thread is thin enough).
Hi our new dog has chewed the strap of my daughter’s shoe is like to try joining it any ideas very much appreciated! I’ve done basic sewing with normal thread and needle but unsure how to proceed with a leather shoe strap? They’re an expensive pair of sandles so am not happy but can’t scold as dog is new and a rescue so have to blame ourselves for leaving it out but could still cry! Thanks so much Angela 😊
Hi again thanks so much that’s what I was hoping to do so that’s fantastic! I only have normal sewing supplies though. …is the multi tool to pre punch the holes? Sorry for my ignorance this will be my first attempt at sewing leather so I’m thinking a normal needle won’t lunch through? Luckily I can match up the two parts fairly well and the strap is only 1cm or so wide so won’t be big job just daunting as first attempt!
Thanks again
Angela 😊
All you’d really need is 2 needles, thread and an awl to pre-punch the holes. Since it’s only a few holes you’ll need, you might be able to get away with using anything pointy and sharp to punch those holes.
Hi, am looking to make my own leather watch strap for my brother’s upcoming birthday (as a birthday present for his Vintage Seiko Speedtimer) and have found many tutorials online. However, the tutorials mainly focus on the pattern making, cutting and burnishing of the strap rather than the stitching. I’m interested in learning how to stitch a single stitch bar tab like the ones in the pictures attached. Would be extremely gratefull if anyone could link me to pictures or a video tutorial illustrating how to sew such a stitch. I also have some excess Linen thread bought from Le Prevo and am wondering if its good enough. Any suggestions for the thread thickness and source (maine thread company?) would be much appreciated.
I haven’t tried this before but my guess would be that there is a knot that is pulled into the stitching hole? Maybe someone who has done these before can shed some light on this technique?
Hi,
Great tutorial! Your result is so neat that I’m quite ashamed of what my usual one looks like.
Question: whenever I sew, especially leather and/or over a long length, I end up with “burning”, extremely painful finger tips because of the regular pushing of the needle. Can you recommend some protective equipment that would allow me to still feel the thread very easily (i.e. not a thimble)?
Thank you
I haven’t tried this but there are sewing palms that are supposed to help. I usually just make sure I punch big enough holes (chisel and/or with an awl) so that this isn’t really an issue. The tightening of the thread does however hurt after a long stint. Sometimes I use leather “rings” I made to protect my pinkies but it does make it harder to get the right feel and tension.
You can simply continue with a new one but make sure to start 2 holes before the one where you ran out. I normally add a small knot at the end of the thread but it would hold without that too (the new thread keeping the ending one in place).
Thank you very much! I was wondering…why is it so important to use ‘waxed’ thread? I’m sorry 😉 but I want to know ‘why’ I am doing certain things 🙂 Kind regards!
Thank you for the tutorial! Much appreciated.
Did some leather-work as child & now this is REALLY worthwhile learning just how to do this. I combine it with Woodworking in my do-all Workshop. Great for exercising my 70year old arthritic hands &, yes, if you say so, brain. THANKS a lot! Stan from the best peope & place – Red-Dune Kalahari.
Great tutorial! You did a great job showing the steps. Very informative!
CAN I USE WAXED DENTAL FLOSS????????
Hmm, I have not tried that but it should work!? Interesting thought!
BTW, you can also use normal polyester thread (unwaxed)
Wonderful tutorial with great photos!
I’m trying to find information on how to stitch two pieces together that would lay flat side by side rather than one top of the another, any suggestions?
Hi Beth, there are different ways to do that. For example you could go with an X pattern. Hopefully that makes sense… It’s a bit hard to explain without photos. I’ll add that to a future post.
Hi Beth,
I made a hat 20 years ago with a stitch that shows only on one side. The other side has an almost invisible joint where the two pieces butt together, just as you describe. I don’t remember how I did it and it seems an impossible stitch as I look at it now. I’ll email you pictures of both sides, if you like; maybe you can figure it out and tell ME.
How
What is the vice or tool holding the leather? Please show a picture of it.
Hi Dawn, that’s a stitching pony or stitching horse. They come in different sizes (small ones you can have on a table or up to large ones with a chair/bench attached). You can find them at any leathercraft store or at places like weaver… Or you can make your own
Hi Attila,
Excellent Tutorial thank you very much! This really helped me get into it! How do you get your stitching to line up perfectly on both sides? Meaning, my stitching lines up perfectly on the side that i push the awl through but then on the other side it’s less in line? Do you press the awl through from both sides or what? Thanks so much.
Marius
Hi Marius, that’s great to hear!
Re: lining up both sides: Depending on the pieces that I want to sew, I might for example pre-punch the holes on both sides (you can use a stitching punch or chisel for that) or when I push the awl through from one side, I’m watching the other side and make sure that it comes through where the stitch is marked. This obviously only works if you run the stitching wheel on both sides and make sure that you have the same number of stitches on both sides, too.
Hope that helps
Attila
It can help to pre-punch with both faces alongside each other, right side up, butted edge to edge. Firstly cut a stitching channel, on both pieces so the channel gauge is the same, then butt the two together, and mark in the channel. Finally, use the awl to pierce on the marks, so they visibly match. Sew immediately so nothing gets displaced!
Do you have any suggestions for binding two edges when putting heavy leather around an object. Like leather around a 1/2 ” dowl
Maybe this type of stitch would work for your project: https://highonglue.com/hand-sewing-two-leather-pieces-cross-stitch-pattern/ ? There are a few variations of that idea. Depends what look you’re going for.
Swagger sticks are usually pre-pierced and sewn wet in a running stitch, passing from the underside up through the next hole on the opposite side every time. As the leather dries, it tightens, pulling what’s already rather a tight seam taut and embedding the thread in the surface.
Hi Marius!!! Thanks for the great lesson. I would also like to know how to sew a flat seam for thick leather. Also, do you have a formula for measuring the length of cord used?
Hi, Thanks for the lesson! Quick question – when you put needle 2 through, then right next to it punch needle 1 through. Does needle 2 go through the needle 1 hole? Silly question but want to be clear.
Thanks!!!!
K
Hi Kirsten! Yes, that’s exactly right 🙂
Hi,
I am stitching three pcs of thick leather for a knife sheath using chisel punch but the back side never comes out even. Any ideas?
Hey Steve, there are a couple of ways to make sure both sides are clean. The easiest is probably using something like a drill press and pre-drill the holes (and then run over it again with the stitching wheel to clean it up).
You could also try to pre-punch the holes on each layer separately. Aligning the layers might end up being tricky though…
If you’re using an awl, you could try and closely look at the back side to make sure you exit the leather in the right position (with pre-marked stitching hole positions).
Those are the main things I’d try first. If it’s really thick, your best bet is probably the drill press.
Since only the outside two pieces show, punch all the holes in those two pieces clamped together, then put the third piece between them and use the existing holes as a guide to punch the middle/hidden piece.
I use 2.5” finishing nails. They make the right size holes and the long length makes them easy to keep perfectly perpendicular. Nail your work to a board by putting the first couple in key stitch spots that insure parts stay aligned perfectly while you put the rest in. The nails need only go 1/8 – 1/4” into the wood. Soft wood like pine is best so they are easy to pull out. I can drive them through 4 layers of 10# leather with ease and it doesn’t weaken the leather like drilling. If the holes are not quite big enough, just leave the nails in for an hour or so before pulling them out. They tend to close up quite a bit after a few minutes if you pull them out quickly. I only leave them in if I’m double stitching.
Very good instruction thank you.
Your tutorial is very detailed. I love it. Thank you for the instructions and the images. They help a lot in learning how to make leather crafts.
Thank you Ivy! Love your site too!
Great tutorial! Is that a diamond or round awl being used?
Thanks Mike, I’m using a round awl for this one.
how, I am wondering how to get such a clamp setup to hold the leather piece vertically as you have shown in the photos. Also, Hobby Lobby has waxed cotton thread. Is that suitable if I am trying to make just a laptop sleeve?
You can look around for a stitching pony or stitching horse (or plans to make one yourself). There are a few variations available depending on the size you might need.
Waxed cotton thread sounds good for a laptop sleeve. I’m not familiar with what Hobby Lobby has (since I’m in Australia) but if it’s waxed thread for hand-sewing, it’s probably good for the job
Hi Attila, what are you thoughts on awls that have thread built-in? I’ve used one, but without the groover or wheel so the stiches aren’t as clean. It seems to make the same stitch but I’m not sure if getting the stitches straight is enough for a more professional-look. Is having separate thread and awl better?
Hi Alvin, I used one of them once for about 5 minutes and didn’t like it at all. Pretty much a waste of money for this type of work. I think it’s best to learn how to sew using 2 needles and an awl (or stitching chisel). Much cleaner and more durable result.
Nice. I’ll be sure to get an awl and/or chisel on the next shopping trip. Thanks!
I’ve used a “Speedie Stitcher” too. It results in a sewing machine type stitch that is less strong and, I think, less attractive, than a two needle saddle stitch
what brand tools are those?
If I remember right they are Craftools
Instead of a groover and stitching wheel…I use old forks I bought at a flea market. I lay the fork with one tine on the leather and the tine next to it along the edge of the leather, and drag it around to create a clean line. Then I bring the fork up and press it along the line I created to make indents showing where I need to pierce.
That’s a cool idea!
Great site! Is there any way to estimate the length of thread needed for a given number of stitches, at a particular pitch? Many thanks.
Thanks Ken! Generally I use around 4 times the length of the area to be sewn and it works out fine for most sizes of stitches and material thicknesses.
Thanks for this and other great tutorials. I’ve just recently started to work with leather and noticed that you use the kind of leather I can’t find in stores. What they sell is a textured dyed leather, not this smooth light-brown one. Is it simply not yet dyed leather?
And if I may ask, can you tell if there is a difference in how hard you pull the threads. It seems that during my last stiching I pulled it too hard and the edges became somewhat distorted.
Thank you very much!
The main leather here is vegetable tanned full grain leather. It’s used for things like saddles and similar sturdy things and is much stiffer than upholstery or garment leather. You should be able to find it in a leathercraft store or maybe even direct from a tannery in your area.
Hi there. Excellent tutorial! I just have a few short questions. Let’s say I’m making something that will lay up against the skin. About that seam, will it be rather thick? I mean, how much would that rub against the skin? I’m assuming it will cause a blister, like our shoes did back in the day. If I were to make a slightly padded lining for it, to avoid rubbing on the skin, could I sew the lining at the same time as the leather? Any suggestions on that?
Yes, you can sew the padded lining to the leather like that to avoid rubbing against the skin. You could also make the stitching groove deep enough so that the thread won’t touch the skin (if the leather is thick enough and/or the thread is thin enough).
Hello Attila. How are you securing the thread in the end? Is it really enough to just backstitch two holes and cut it off?
Normally it is but you could also do a single knot in the last stitch and then cut & melt the ends. I haven’t had any of them open up yet
Hi our new dog has chewed the strap of my daughter’s shoe is like to try joining it any ideas very much appreciated! I’ve done basic sewing with normal thread and needle but unsure how to proceed with a leather shoe strap? They’re an expensive pair of sandles so am not happy but can’t scold as dog is new and a rescue so have to blame ourselves for leaving it out but could still cry! Thanks so much Angela 😊
Hi Angela,
hard to tell without seeing it but if replacing the whole section of the strap is not an option, I’d try something like this stitch to connect the 2 pieces together: https://highonglue.com/tutorial/hand-sewing-two-leather-pieces-cross-stitch-pattern/
Maybe someone else here has an idea and can comment?
Hi again thanks so much that’s what I was hoping to do so that’s fantastic! I only have normal sewing supplies though. …is the multi tool to pre punch the holes? Sorry for my ignorance this will be my first attempt at sewing leather so I’m thinking a normal needle won’t lunch through? Luckily I can match up the two parts fairly well and the strap is only 1cm or so wide so won’t be big job just daunting as first attempt!
Thanks again
Angela 😊
All you’d really need is 2 needles, thread and an awl to pre-punch the holes. Since it’s only a few holes you’ll need, you might be able to get away with using anything pointy and sharp to punch those holes.
Hi, am looking to make my own leather watch strap for my brother’s upcoming birthday (as a birthday present for his Vintage Seiko Speedtimer) and have found many tutorials online. However, the tutorials mainly focus on the pattern making, cutting and burnishing of the strap rather than the stitching. I’m interested in learning how to stitch a single stitch bar tab like the ones in the pictures attached. Would be extremely gratefull if anyone could link me to pictures or a video tutorial illustrating how to sew such a stitch. I also have some excess Linen thread bought from Le Prevo and am wondering if its good enough. Any suggestions for the thread thickness and source (maine thread company?) would be much appreciated.
http://i.imgur.com/jKaiNQH.jpg
http://i.imgur.com/PpB47sZ.jpg
http://i.imgur.com/OJHe5sn.jpg
I haven’t tried this before but my guess would be that there is a knot that is pulled into the stitching hole? Maybe someone who has done these before can shed some light on this technique?
Hi,
Great tutorial! Your result is so neat that I’m quite ashamed of what my usual one looks like.
Question: whenever I sew, especially leather and/or over a long length, I end up with “burning”, extremely painful finger tips because of the regular pushing of the needle. Can you recommend some protective equipment that would allow me to still feel the thread very easily (i.e. not a thimble)?
Thank you
I haven’t tried this but there are sewing palms that are supposed to help. I usually just make sure I punch big enough holes (chisel and/or with an awl) so that this isn’t really an issue. The tightening of the thread does however hurt after a long stint. Sometimes I use leather “rings” I made to protect my pinkies but it does make it harder to get the right feel and tension.
How do you add thread when you run out?
You can simply continue with a new one but make sure to start 2 holes before the one where you ran out. I normally add a small knot at the end of the thread but it would hold without that too (the new thread keeping the ending one in place).
Thank you very much! I was wondering…why is it so important to use ‘waxed’ thread? I’m sorry 😉 but I want to know ‘why’ I am doing certain things 🙂 Kind regards!
Hi Izabel, waxed thread is stronger, and easier to sew with (won’t fray as easily) 🙂