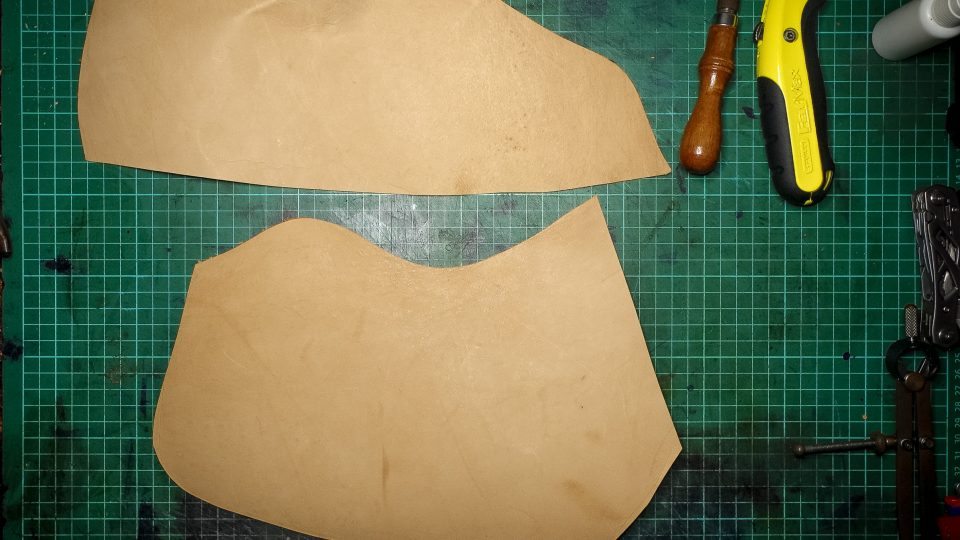
I recently started to use unwaxed kangaroo leather. It’s about 1mm thick and it’s got a great feel to it. It is a slightly dark tan finish, which will get a bit darker once I seal it with conditioner. This wallet design would work with any similarly thin leather.
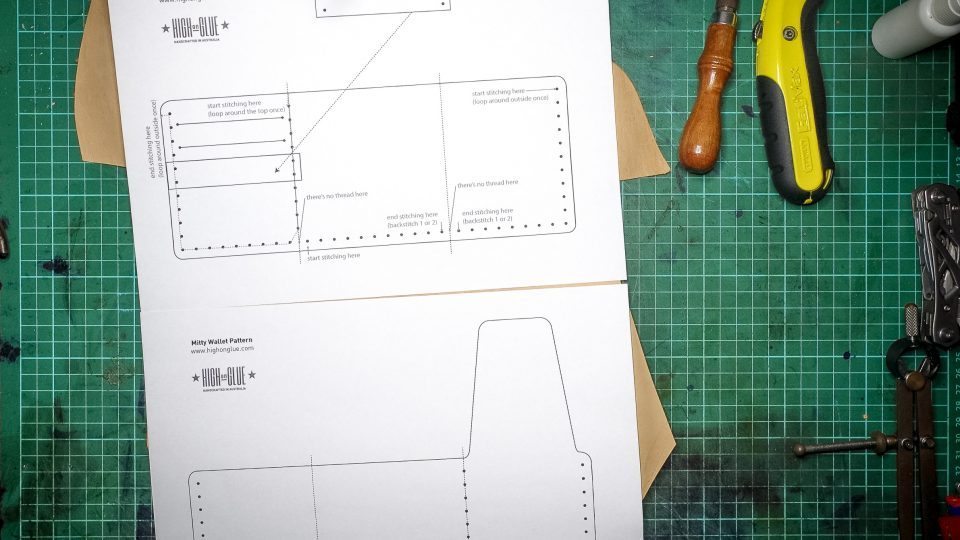
Print out pattern
This pattern should give you all the instructions needed to make the wallet. Make sure you print it at 100%
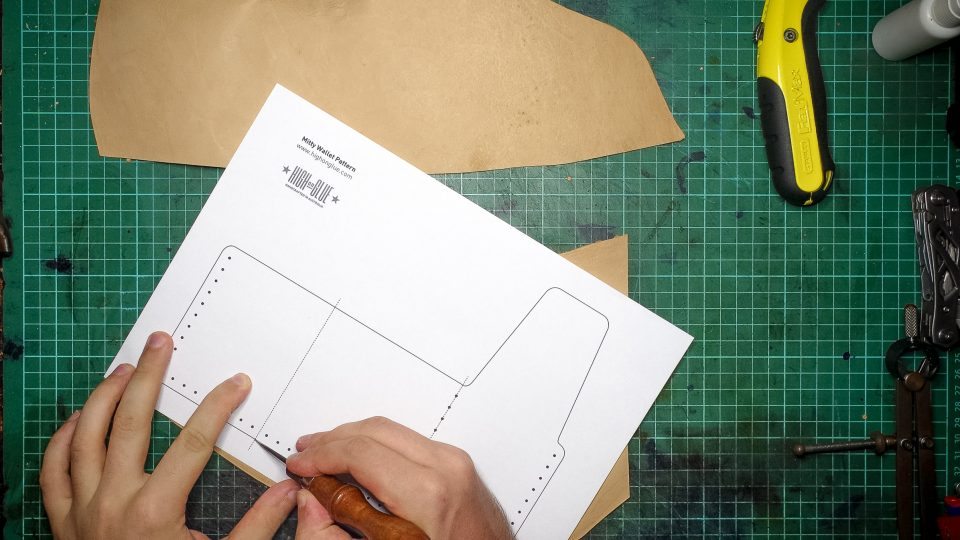
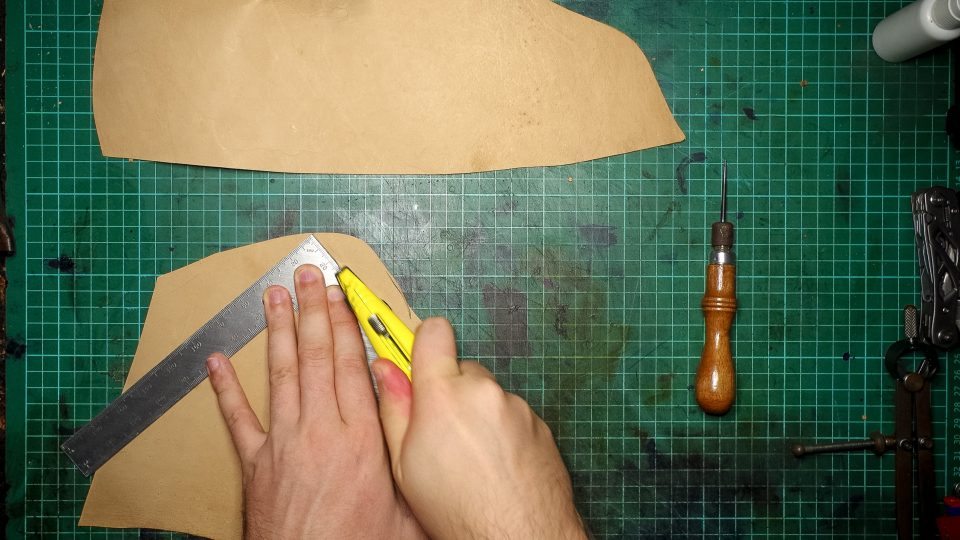
Trace pattern
Trace the pattern including the stitching hole markings (on one side)
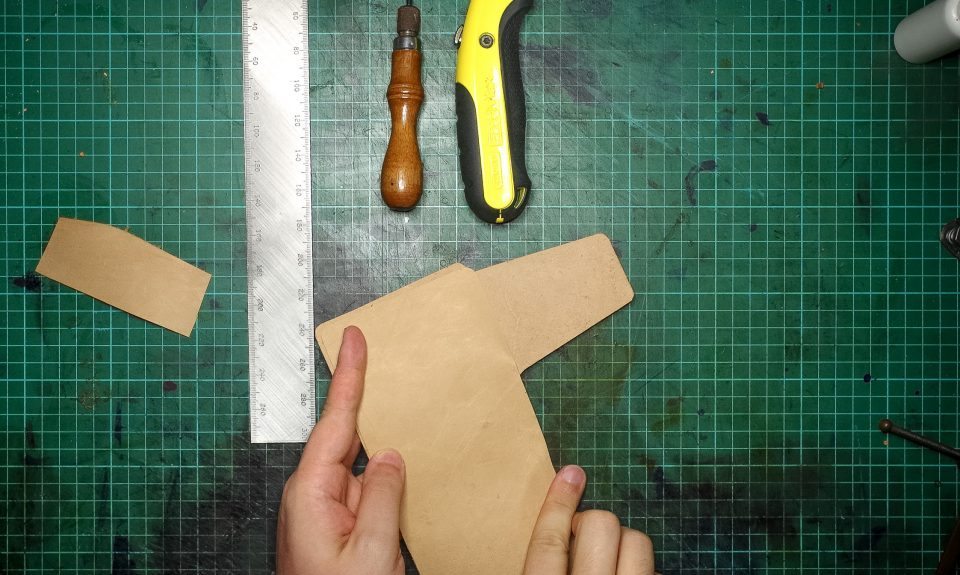
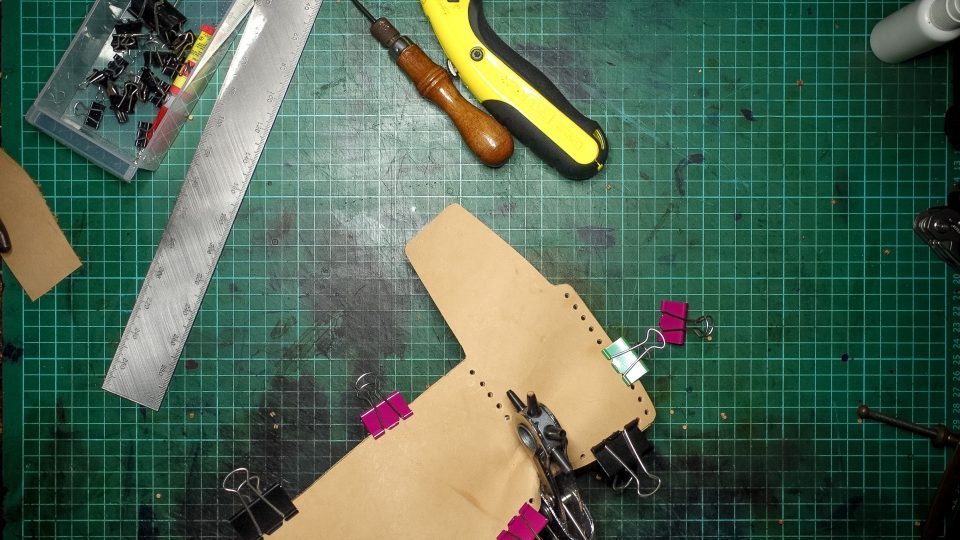
Lay pieces on top of each other
Before punching the holes, put the pieces together and clamp them in place.
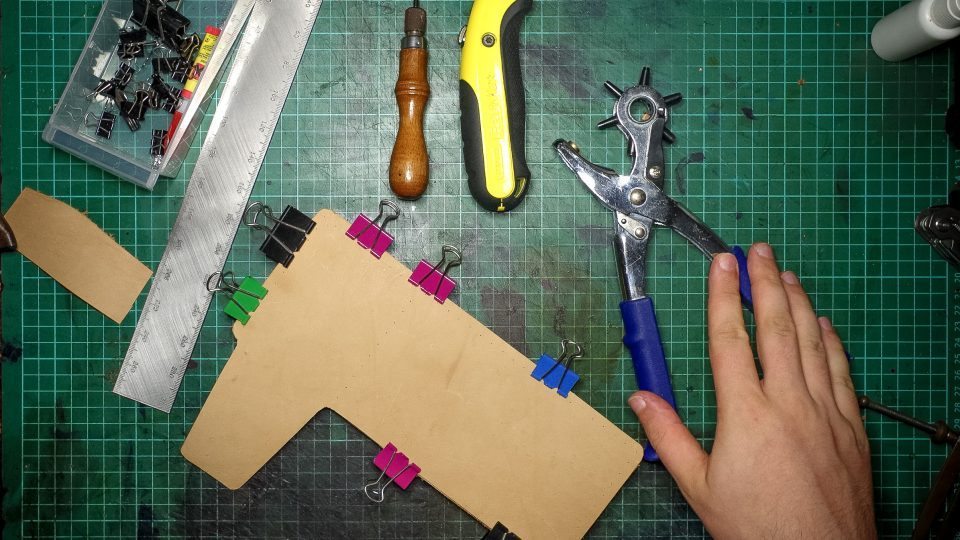
Clamped piece
Binder clips from the office supply store are useful for clamping the parts together.
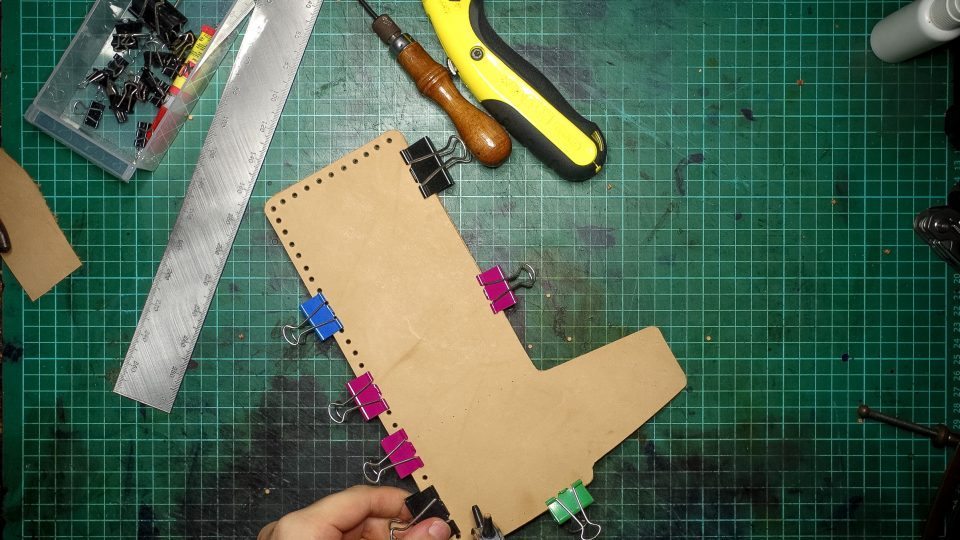
Punch the stitching holes
Go along the marked stithing holes with a rotary punch (or similar). If the spacing or alignment is slightly off, don’t worry about it.
Hard to reach places
The centre of the wallet is a bit hard to reach with a normal rotary punch. If you don’t have other punches, you’ll have to crumple the leather a little. Since we’ll stretch and bend the leather later, it doesn’t matter if we leave small marks.
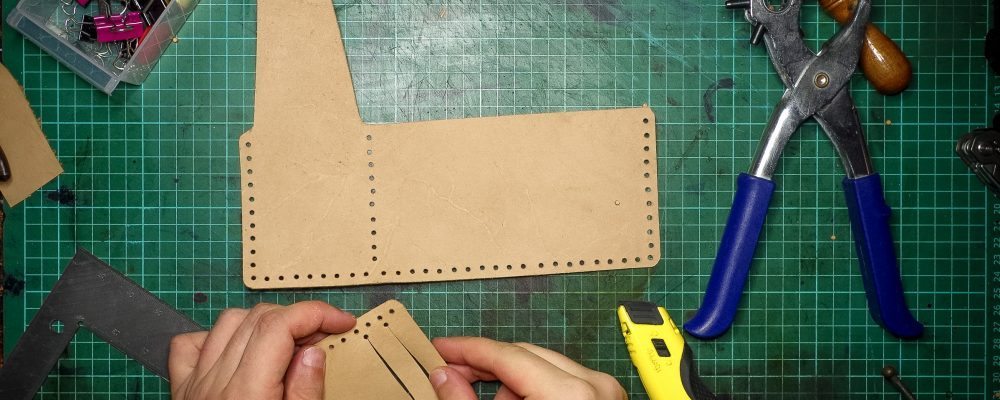
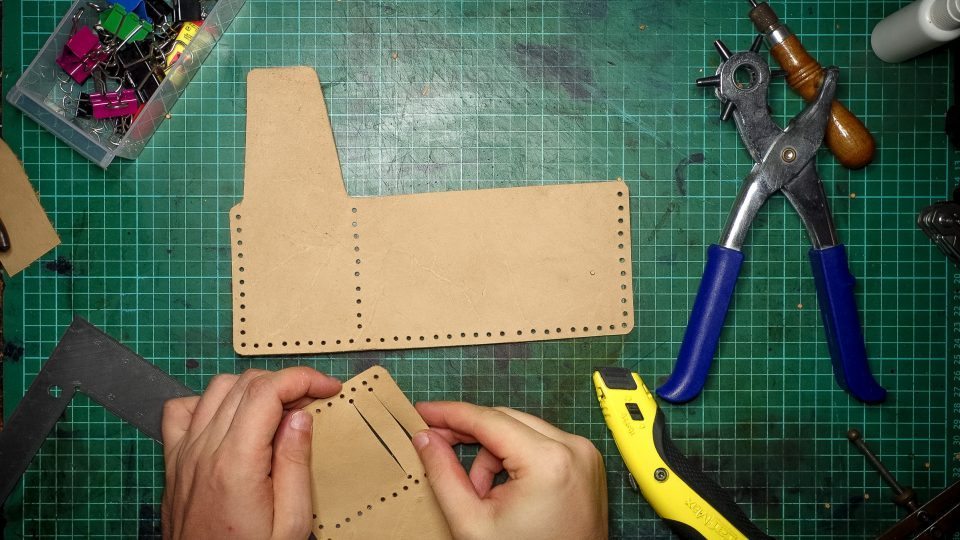
Card Slots
Mark the card slots. Be careful to not get it too close to the main stitching holes punched in the previous step
Cut the card slots
Cut between the 2 card slot holes.
Cut out strip
Cut out the strip that holds the flap down. We’ll align the stitching holes in the next step
Align stitching holes
Hold the strip one hole from the bottom card slot, mark the position of the 2 holes you’ll need on either side and punch them. Make sure that you don’t align it in a way that’ll lead to one hole being too close to the edge.
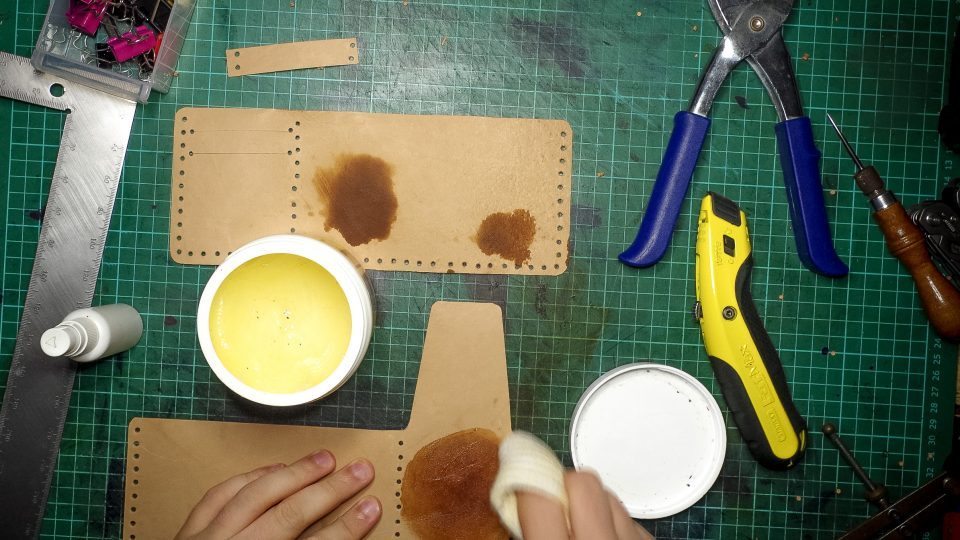
Condition or Finish
I’m adding some leather conditioner and oil to finish and seal the leather before stitching
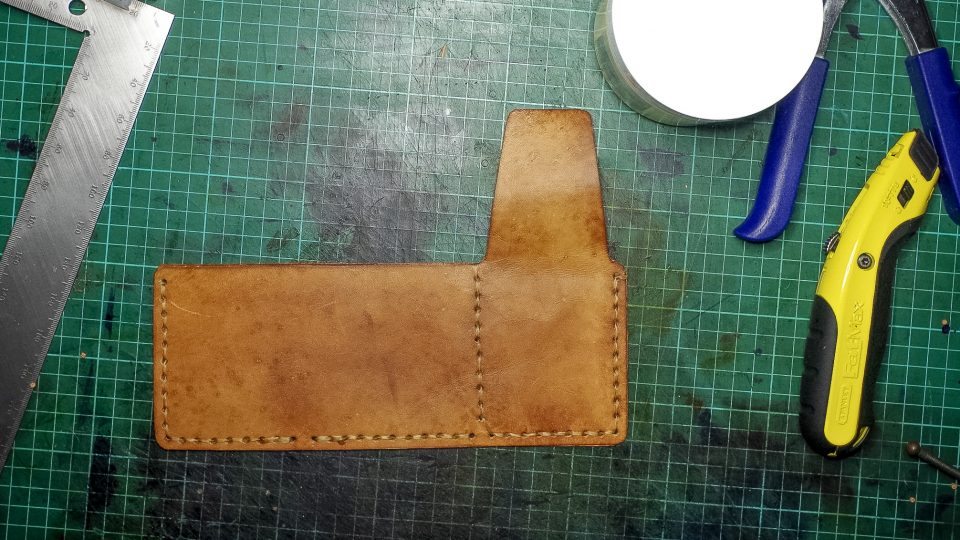
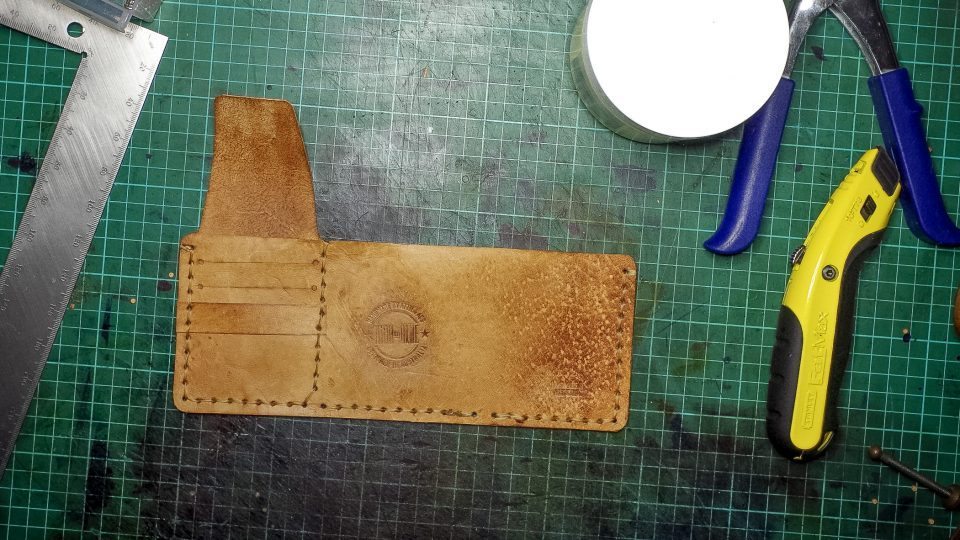
Stitching outside
The pattern has all details you’ll need for the correct stitching pattern.
Visit https://highonglue.com/how-to-hand-sew-thick-leather/ for a detailed description of how to sew by hand. I used artificial sinew for this one.
Here’s a time-lapse of the making process:
Related
49 thoughts on “How to make a leather wallet inspired by “The Secret Life of Walter Mitty””
You, your site, your generous nature, a rare and wonderful thing.
I will be buying something soon, a little skint at the minute….but considering that you give the plans away for free, you can expect a free lunch in two weeks time, and that’s a promise…..I don’t break them 🙂
Have a great day and thank you for your time in putting this wonderful site together 🙂
You can get the leather from places like Tandy Leather or if you’re in Australia: Birdsall Leather, Packer Leather, Mac Lace or the Greenhalgh Tannery. I’m sure there are other places, too. But I haven’t tried all of them
Dob’t forget, if you start tooling the wallet, you need a veg tan leather. Check pressing a damp finger – if the leather takes the damp, turning darker, then it’s good for tooling.
Thank you for this tutorial. This movie has changed our lives, it was such an inspiration to my husband so I am making the wallet for him. So I got all the materials to make the wallet.. What would I use the Aw for? I don’t see it being used in the tutorial for anything other than marking.
Yes, you’re right. It’s only used for marking. You could use any other similar sharp object if you don’t have an awl already. I added it to the list so that it’s complete.
The materials are a list of things I usually use. You could make this wallet without an awl, binder clips and even needles. A hole punch and something to cut the leather is all you really need.
Hope you’ll enjoy making it!
Hi Matt, the inside dimensions of the wallet are about 90mm high and 155mm wide. So the £50 note is pretty close but could be folded in half. I fold almost all my notes in half before I put them into the wallet (and Australian notes are much smaller than UK ones)
Hi Darren, you should be able to set your printer to not scale the image and it’ll work out how many Legal size sheets it’ll need to fit the page. The original template I did for this is on card stock. I worked out the measurements and cut it out by hand. You could also take the pattern file and use the measurements to draw it up without printing it out.
Sorry but your design is not the same. I’ve printed it several times with different programs and different scales (100% included) and your 2 peices don’t line up.
Hi, I have the same question, you clamp the two pieces together and punch the holes together, how can they be different sizes? what am I missing. I did use the pattern for the larger piece to make both sides and it didn’t come out great, but it was a proptype to try… making a finished product now.
You’ll have to punch the holes separately on both pieces or if you do want to clamp them, do them in sections and move the larger piece in place. I normally punch the holes using the template and it always fits at the end
hi, one more question, what are the actual dimensions? i have it printed twice and they are different sizes! one is too small for US Dollars one is very large. one is 260 x 97 mm (10.25 x 3 7/8 in) the other is 235 x 89 mm (9.25 x 3.5 in)
You should be able to print it out at 100% scale (look in your printer options). That’ll be the most accurate. I don’t have one here right now but by memory it’s about 25cm
is it possible to use a prong punch instead of a rotary punch?
The trick for a hole punch in the middle of large surfaces is not to use it as a hole punch at all, rather to use it as a wadding punch. Dial your chosen punch so it’s on the opposite side of the wheel from where it normally is, and put some thin softwood or thick waste leather between the head that’s there and the anvil, to protect the edge.
Turn the punch over, you’re going to use it upside down. Put some more waste under the leather to act as an anvil. Position the punch over the leather where you want the hole and hit the rear over the anvil with a hammer, so the blow passes through the head into the cutting head opposite.
Great pattern, thank you! I made a really nice wallet yesterday. Too bad I can‘t add a picture to this post. The only thing I miss a bit is a small slot for coins, perhaps I will add it. Thank you again for the pattern and tutorial!


Love your site!!!!!!!
thank you!
Just paypal’d ya ! GREAT directions.
Thank you!! I’m glad you liked it 👏
Is this on A4 paper? Can you give approximate sizes of the leather pieces? Thanks!
Yes, if you print it out on A4 without scaling it’ll be at 100%. The piece is 253mm x 98mm
You, your site, your generous nature, a rare and wonderful thing.
I will be buying something soon, a little skint at the minute….but considering that you give the plans away for free, you can expect a free lunch in two weeks time, and that’s a promise…..I don’t break them 🙂
Have a great day and thank you for your time in putting this wonderful site together 🙂
hi can u please email me the pdf for this i cant find it to print it
here’s the direct link
Updated the post to add a big download button so it’s easier to see
Gyönyörű és igényes munkáid vannak, gratulálok!
How would you write on it?
You would use alphabet stamps (something like this: Tandy Leather Craftool 1/4″ Alphabet and Number Stamp Set 8137-00) and add each letter one by one.
Here’s a video that shows the process: https://www.youtube.com/watch?v=5_BzcVN3ZO0
Hi! Can i make slogan of Life magazine on this wallet if i would use alphabet stamps?
Yes, you could. You’ll need to find a stamp set with 4mm letters (not the standard 1/4 inch) to make it fit
Thank you!
After what steps I can do the inscription? Before stitching? (Sorry for my English))
Yes, I would do it before stitching 🙂
Try here :http://www.artisans.co.uk/
I hope you don’t mind me asking, but what do you use the lighter for? I went through the steps and didn’t find one part where you needed the lighter.
The lighter is to burn the ends of the thread. Not really needed, but check out my guide for hand sewing leather for more information.
This is Awesome! Where did you get the leather?
You can get the leather from places like Tandy Leather or if you’re in Australia: Birdsall Leather, Packer Leather, Mac Lace or the Greenhalgh Tannery. I’m sure there are other places, too. But I haven’t tried all of them
Dob’t forget, if you start tooling the wallet, you need a veg tan leather. Check pressing a damp finger – if the leather takes the damp, turning darker, then it’s good for tooling.
Thank you for this tutorial. This movie has changed our lives, it was such an inspiration to my husband so I am making the wallet for him. So I got all the materials to make the wallet.. What would I use the Aw for? I don’t see it being used in the tutorial for anything other than marking.
Yes, you’re right. It’s only used for marking. You could use any other similar sharp object if you don’t have an awl already. I added it to the list so that it’s complete.
The materials are a list of things I usually use. You could make this wallet without an awl, binder clips and even needles. A hole punch and something to cut the leather is all you really need.
Hope you’ll enjoy making it!
What .oz leather was used?
I used Kangaroo leather which is around 1-1.2mm thick. That’s around 3oz
very quick and easy to make
Thank you for the tutorial! I’ve just finished this wallet, very easy to do. Not a bad for a beginner 🙂
thank you so much.
Would english bank notes fit into to wallet?
Hi Matt, the inside dimensions of the wallet are about 90mm high and 155mm wide. So the £50 note is pretty close but could be folded in half. I fold almost all my notes in half before I put them into the wallet (and Australian notes are much smaller than UK ones)
Hi! Will the measurements be off when printing “Legal” size vs. A4 or A2? Not sure how that works. And did you make the template out of card stock?
Hi Darren, you should be able to set your printer to not scale the image and it’ll work out how many Legal size sheets it’ll need to fit the page. The original template I did for this is on card stock. I worked out the measurements and cut it out by hand. You could also take the pattern file and use the measurements to draw it up without printing it out.
Thanks a ton for this tutorial! Just wondering, were can i buy that finish or conditioner that you used for the leather?
Thank you! I used this one: http://amzn.to/1kKkITg Fiebing’s Aussie Leather Conditioner
Sorry but your design is not the same. I’ve printed it several times with different programs and different scales (100% included) and your 2 peices don’t line up.
Hi Dries, the pieces don’t line up because that helps to fold the wallet into its final form. The inside of most wallets is smaller than the outside.
Hi, I have the same question, you clamp the two pieces together and punch the holes together, how can they be different sizes? what am I missing. I did use the pattern for the larger piece to make both sides and it didn’t come out great, but it was a proptype to try… making a finished product now.
Hi Mike,
You’ll have to punch the holes separately on both pieces or if you do want to clamp them, do them in sections and move the larger piece in place. I normally punch the holes using the template and it always fits at the end
ok thanks for the clarification!
hi, one more question, what are the actual dimensions? i have it printed twice and they are different sizes! one is too small for US Dollars one is very large. one is 260 x 97 mm (10.25 x 3 7/8 in) the other is 235 x 89 mm (9.25 x 3.5 in)
You should be able to print it out at 100% scale (look in your printer options). That’ll be the most accurate. I don’t have one here right now but by memory it’s about 25cm
is it possible to use a prong punch instead of a rotary punch?
yes, it’s just a different style (depending on the type of punch you have). I made a similar wallet design with smaller stitching hole distance (prong punch) here: https://highonglue.com/tutorial/making-a-tri-fold-wallet-from-one-piece-of-leather/
I think a number 6 gap looks really cool with a linen thread. 🙂 Good luck. It’s so rewarding.
This is what I’ve been looking for for ages!! Love it. I was going to buy one from http://www.crookedasanother.com but may noy buy one
The trick for a hole punch in the middle of large surfaces is not to use it as a hole punch at all, rather to use it as a wadding punch. Dial your chosen punch so it’s on the opposite side of the wheel from where it normally is, and put some thin softwood or thick waste leather between the head that’s there and the anvil, to protect the edge.
Turn the punch over, you’re going to use it upside down. Put some more waste under the leather to act as an anvil. Position the punch over the leather where you want the hole and hit the rear over the anvil with a hammer, so the blow passes through the head into the cutting head opposite.
Thanks for the tip!
Great pattern, thank you! I made a really nice wallet yesterday. Too bad I can‘t add a picture to this post. The only thing I miss a bit is a small slot for coins, perhaps I will add it. Thank you again for the pattern and tutorial!